If you have a domain that doesn’t have SSL certification. You can set up SSL certification for free.
In short, what we will be doing is
- Using zerossl site we will generate SSL cert files.
- Using cPanel Dashboard we will activate SSL.
- Finally, we will add redirect logic to move from HTTP to HTTPS.
Note: I have tried this on GoDaddy web hosting using cPanel.
Step 1:
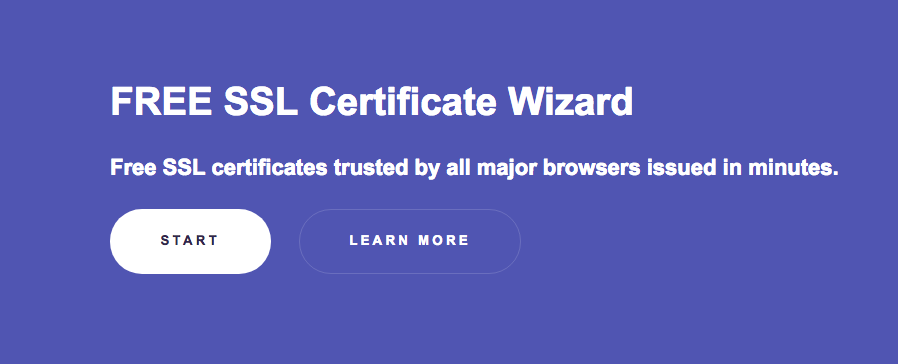
- Goto this site: https://zerossl.com/
- Click on Online Tools button => FREE SSL Certificate Wizard => Start Button.
- Something like this
Step 2:
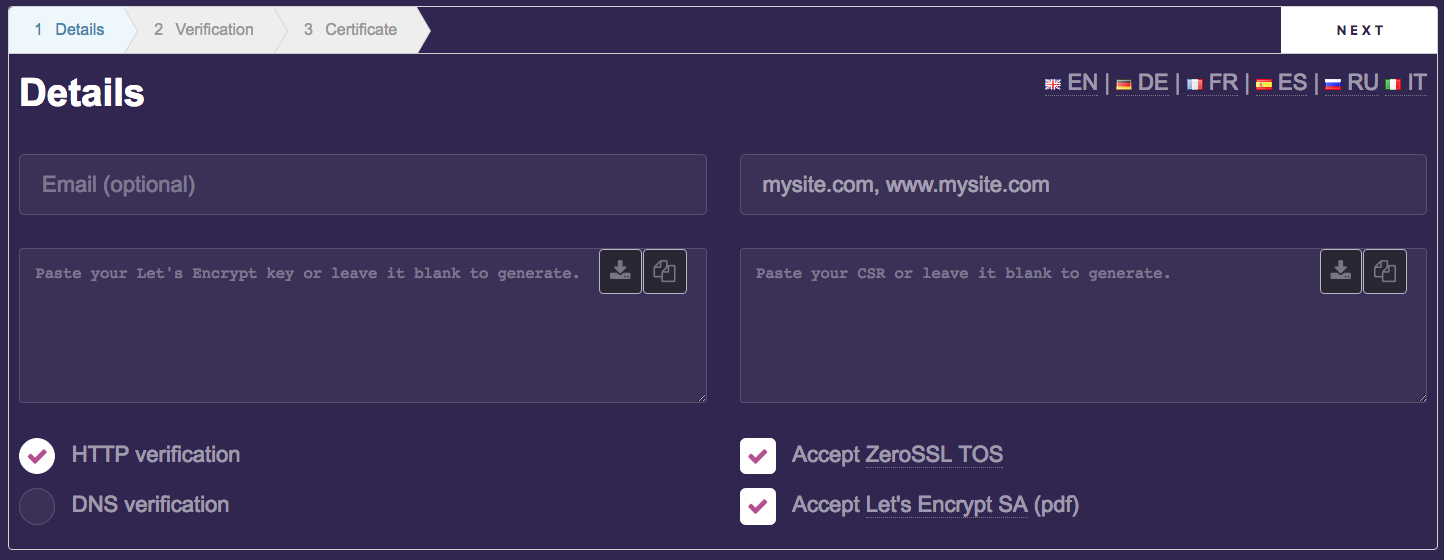
- In Detail Tab entry your Domain in Box saying “Domains (ONLY if you have no CSR)“
- eg: mysite.com, www.mysite.com
- Also, tick Accept ZeroSSL TOS and Accept Let’s Encrypt SA (pdf) given at the bottom.
- Refer below image.
- Click Next
Step 3:
- Your Domain CRT is generated in the right Text Box. Just click Download Button to keep a copy of it.
- Click Next
Step 4:
- Your Account key will be Generated on Left box
- Again Download it
- Click next
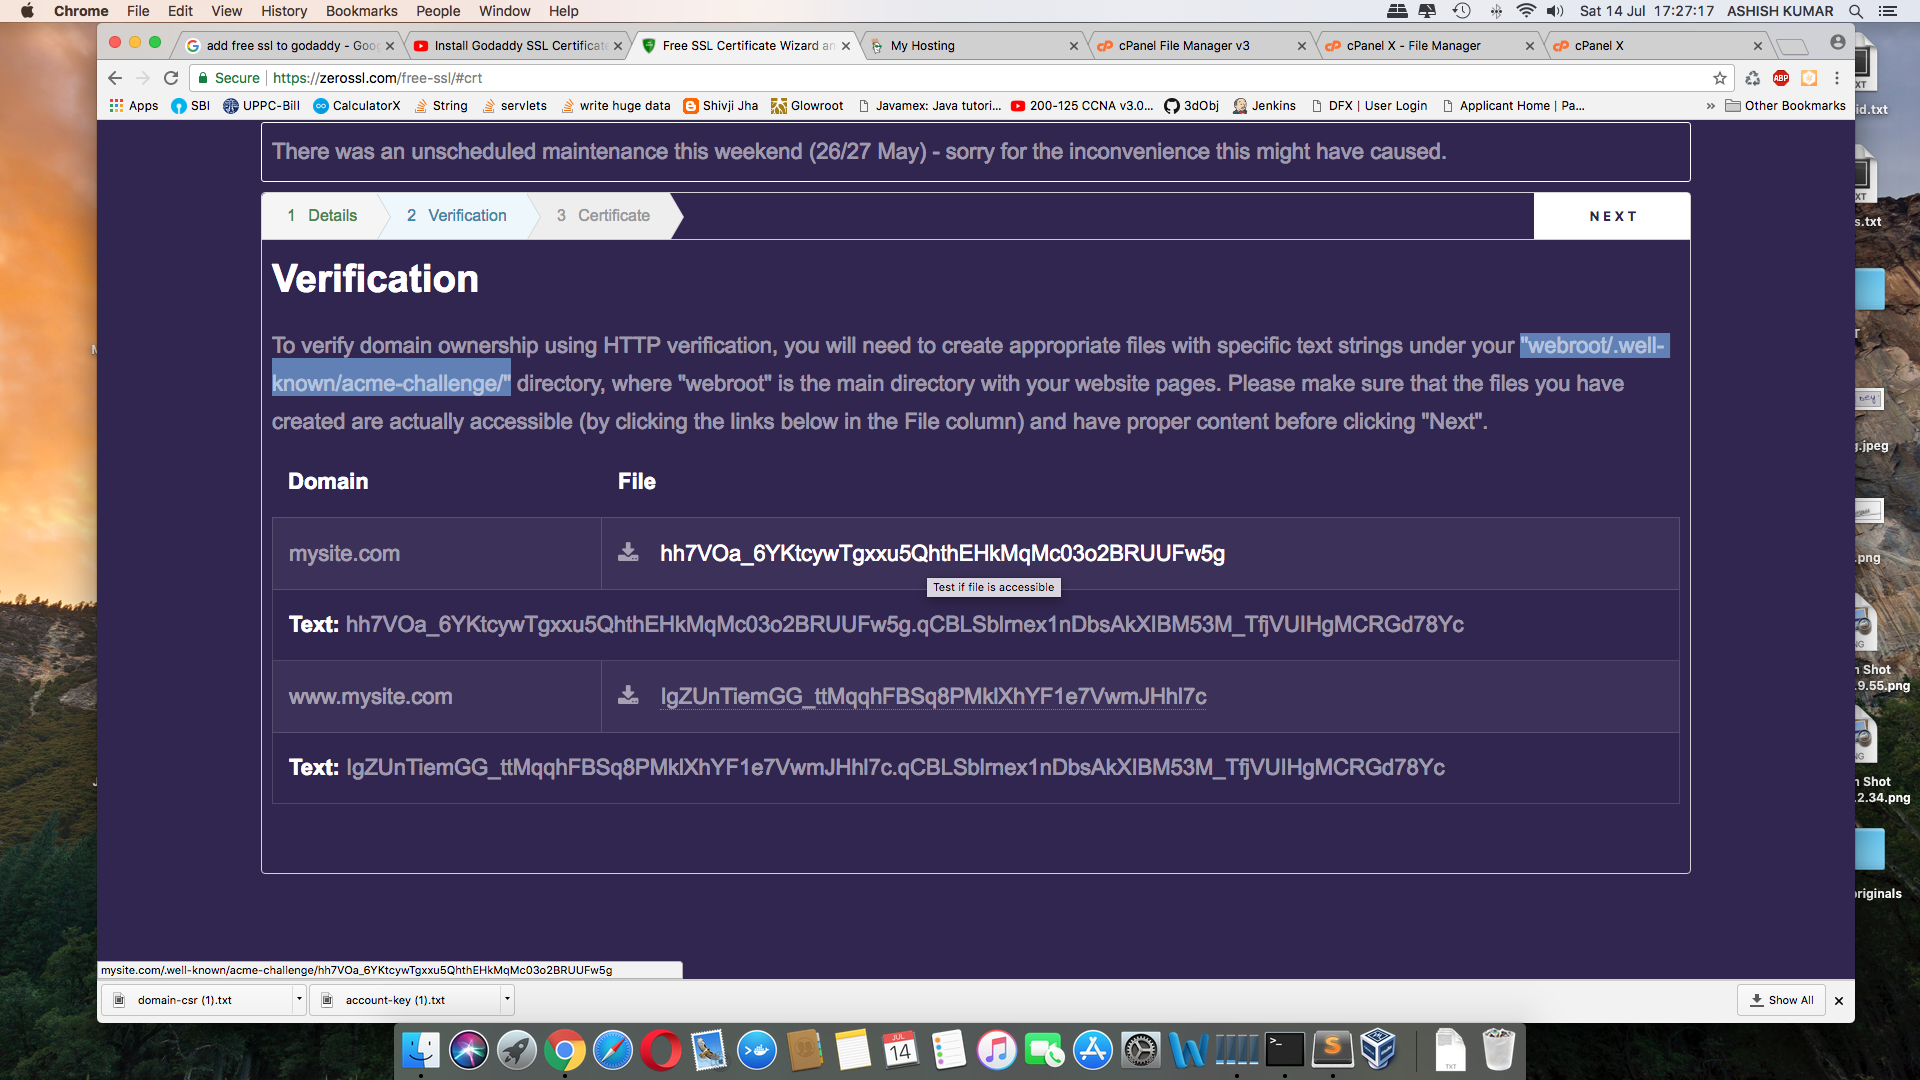
Step 5:
- Now you will see the Verification Tab. It contains 2 files related to your domain.
- Download both files.
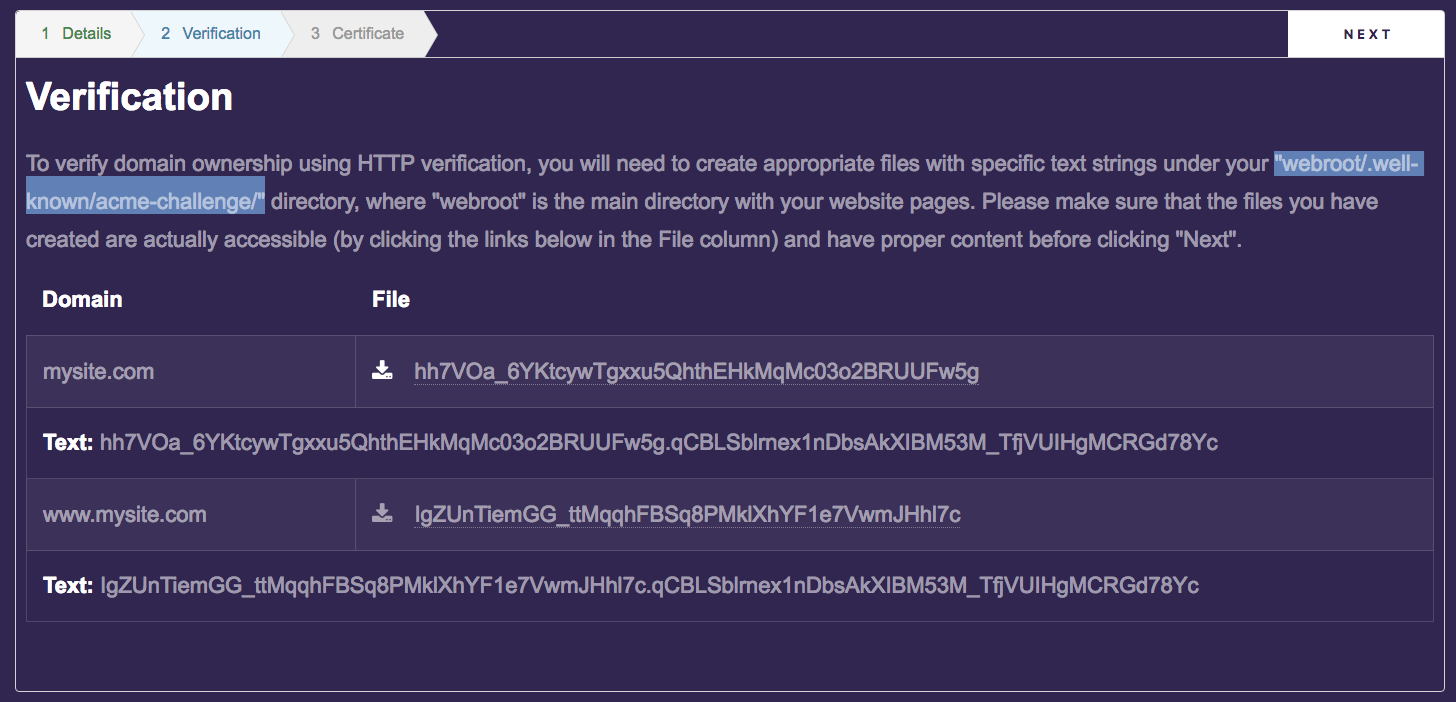
- In order to verify that you are the owner of the site for which you are generating SSL key. You need to place both files in “webroot/.well-known/acme-challenge/”
- In my case public_html/.well-known/acme-challenge/
Step 6:
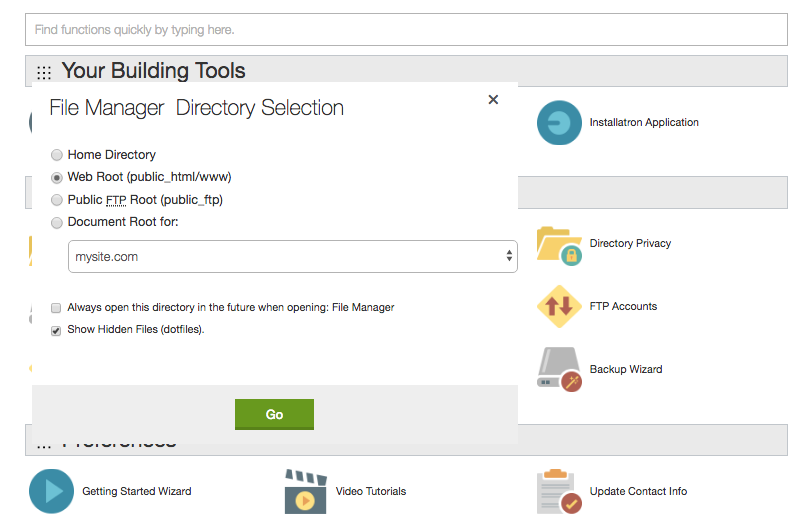
- Now we need to access the domain folder and upload above files using cPanel.
- Go to your Domain cPanel Dashboard.
- Click File Manager
- Note that in Dialog “Show Hidden Files (dotfiles).” is checked else you will not see hidden files.
- Click Go
Step 7:
- Move inside public_html
- Create a folder with name “.well-known“
- Move-in .well-known
- Create another folder with the name “acme-challenge“
- Move-in acme-challenge
- Now upload the files which you have downloaded from Verification Tab.
Step 8:
-
- After uploading both files
- Goto zerossl tab and click the file link. It will open another tab with the file content which you just uploaded. Refer below image.
- If you can see the text. You have uploaded files correctly.
- Hit Next in zerossl tab.
- You will see “Your Certificate is ready “
- Scroll Down you will have your CRT and PRIVATE KEY. Download it for a Backup.
Step 9:
- Now since we have got our SSL cert files. The next step is to configure SSL.
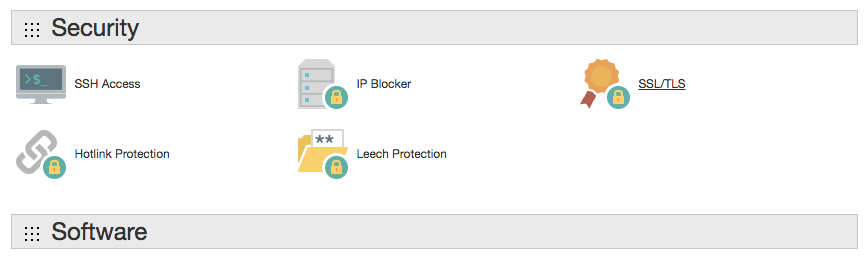
- Goto Cpanel Dashboard
- Scroll Down to Security => Click SSL/TLS. Refer below image.
Step 10:
- In this window, you will see various options to configure SSL. Click the last option “Manage SSL sites.“
- In next screen select the Domain for which you are adding SSL
- In Certificate: (CRT)
- Copy text from Wizard first text box.
- Paste it in the SSL CRT textbox.
- It might say invalid as there are 2 keys into it.
- Something like this
- Cut the last Certificate text and paste it in Certificate Authority Bundle: (CABUNDLE) textbox.
- Now copy the Private Key from zerossl tab and paste it in Private Key (KEY) textbox.
- Hit Install Certificate
- If everything went well you will see success Msg.
Step 11:
- Verify that SSL is installed.
- Try https://mysite.com in a new tab and it should work.
- Now try http://mysite.com also in the new tab.
- It works but it’s not secure or https
- So we need to configure a redirect from HTTP to HTTPS
Step 12:
- Goto cPanel File Manager.
- Move to public_html folder.
- Inside public_html look for .htaccess if it exist, edit it
- Else create a new file with “.htaccess”
- Inside .htaccess add in last these lines
- Save file.
- Now try http://mysite.com it should redirect to https://mysite.com
Bingo. You have just installed SSL Cert for Free…
Note: In case, installation doesn’t work for you or you didn’t understand steps you can refer a sample installation video
1 Comment
RG Sayson · March 22, 2019 at 9:40 pm
Thank you! It worked!!